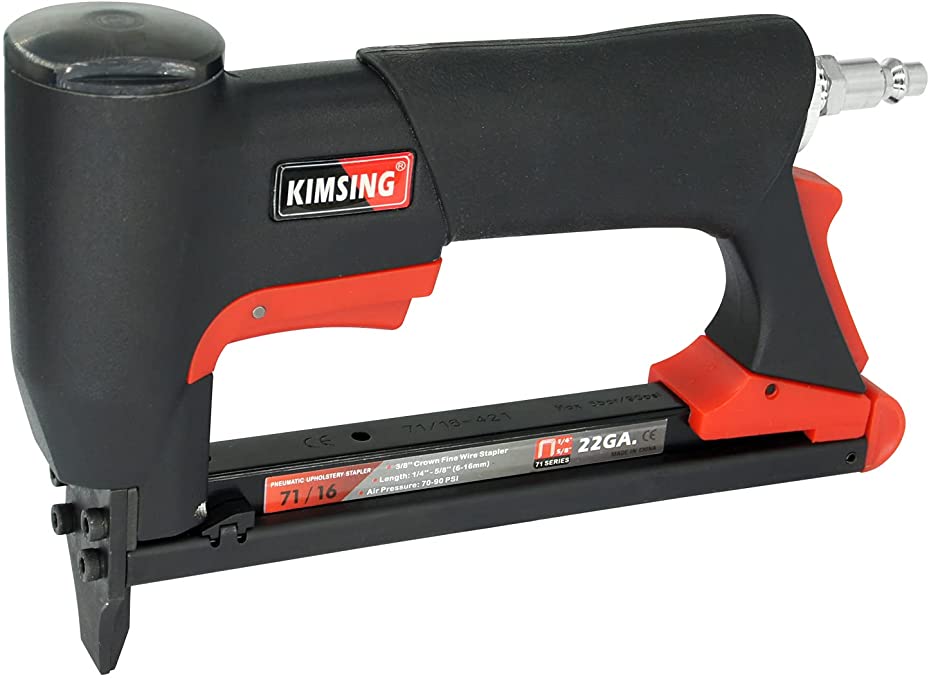

Light & Strong in Your Han. The aluminum case is very durable and has a good center of gravity, which makes the device light and easy to use. Be nice to people who are in pain because of arthritis. Long life with little or no use. Having a staple gun that is both black and red makes it look modern and doesn’t show dirt as much.
Adequate Power: Drive with an air compressor, but use less air. Having a lot of power, I could go through most of the material without any problems.
Whether your hands are weak or not, it’s easy to drive the staple into the wood in a split second. Flush and easy. A real time and energy saver when compared to the manual or electric staplers that are so hard to work with.
More Careful Designin.
Staple Visual Window: When there aren’t any more staples, the window will show how many are left so you can buy more to keep working. Rear Exhaust: Keeps dust or oil away from your working surface. Rubber Textured Grip: Feels good in your hand. The hidden silencer reduces the noise made by the exhaust and makes it quieter, so the hands don’t get tired.
It is very easy to use: The bottom slide loading lets you load nails with ease. The nose is short and thin, which makes it easy to get into every corner. Because the plastic-sensitive button doesn’t need a lot of force to touch, you won’t get cramps. The less jamming feature reduces the amount of staples that are wasted. The whole process of upholstering is very smooth and steady, and it goes very quickly.
Work with 22 gauge 3/8″ crown 71 series staples, which are easy to find on Amazon or in your local store. They have a leg length of 1/4″ to 5/8″ (6mm to 16mm).
Many Different Uses.
In addition, they’re used a lot for attaching cloth, leather, canvas, and other materials to wooden frames.
The media couldn’t be loaded because it was too big to move.
You should avoid the KIMSING 71/16 if you don’t know how to disassemble and fix a new pneumatic stapler that’s been broken for a long time. So let me be clear: No company has ever had a perfect production history. It is possible that I got one of the few, broken staplers that KIMSING has ever made. However, I can only write a review based on what I got, so here we go. It looks like this product is brand new and well-made from the pictures I sent. opened it up and put 14 inch staples inside. I attached it to my new air compressor so I could staple some insulation I was working on. It didn’t work very well. I pushed the button and both heard and felt the “bang” that comes from a pneumatic stapler. There were no staples fired after I pulled the trigger six times. A pneumatic stapler isn’t something I’ve used before, so I don’t know how to use it or what to do if it doesn’t work right. There is good news: I have a degree in engineering, so I’m pretty good at figuring out and fixing mechanical or electric problems. Afterward, after I sat down and thought about the process, I realized that when I put the staples inside the stapler and closed it, the staples didn’t look like they were under any stress. You open the stapler and pull the slot back to open it. When you do, there is resistance from an endcap that is attached to a spring. There is a lot of tension coming from this spring that feeds the things that stay together. Staples came out of their slots on the KIMSING when I reopened the staple slot. I noticed that there was no end piece that was attached to a spring to keep the staples in place. I could see part of a spring under the staple rail, but it was still and couldn’t be reached unless you took the machine apart. Again, this product didn’t come with any operating or troubleshooting instructions, so I used my engineering skills to move forward. This is why, unless you have a lot of experience with mechanics, I don’t think you should buy this product. You might have to try to fix it when it arrives. As my last project of the day, I didn’t have time to waste. Taking apart, diagnosing, fixing, and putting it back together took me three hours and a lot of different tools I own. I’m happy to say that, after I fixed the machine, it worked perfectly on the first 100 or so staples I used. I’m sure it will keep working that way. I have sent you a video of the stapler working again after I fixed it. Just in case you’re wondering about the problem with my unit, I’ll give you a quick answer here. If you look at the picture with the staple loader out, you will see that there is no mechanism to stop the loader at the end with the spring. A metal block that was supposed to be attached to a spring was stuck to the front of the stapler. The spring had popped off and retracted into the stapler’s undercarriage, which was out of reach. I had to disassemble the unit to figure out what was wrong with the stapler. To get the end of the spring out, I used a special tool to snake around and behind it. I then reattached the end of the spring to the metal block that was jammed, and then carefully reattached it to the end of the staple rail. There were staples that I pushed into a metal block at one end of a rail. I then put it back together. It’s shown in the video. If it doesn’t stop working right now, I don’t think it will work at all in the future.