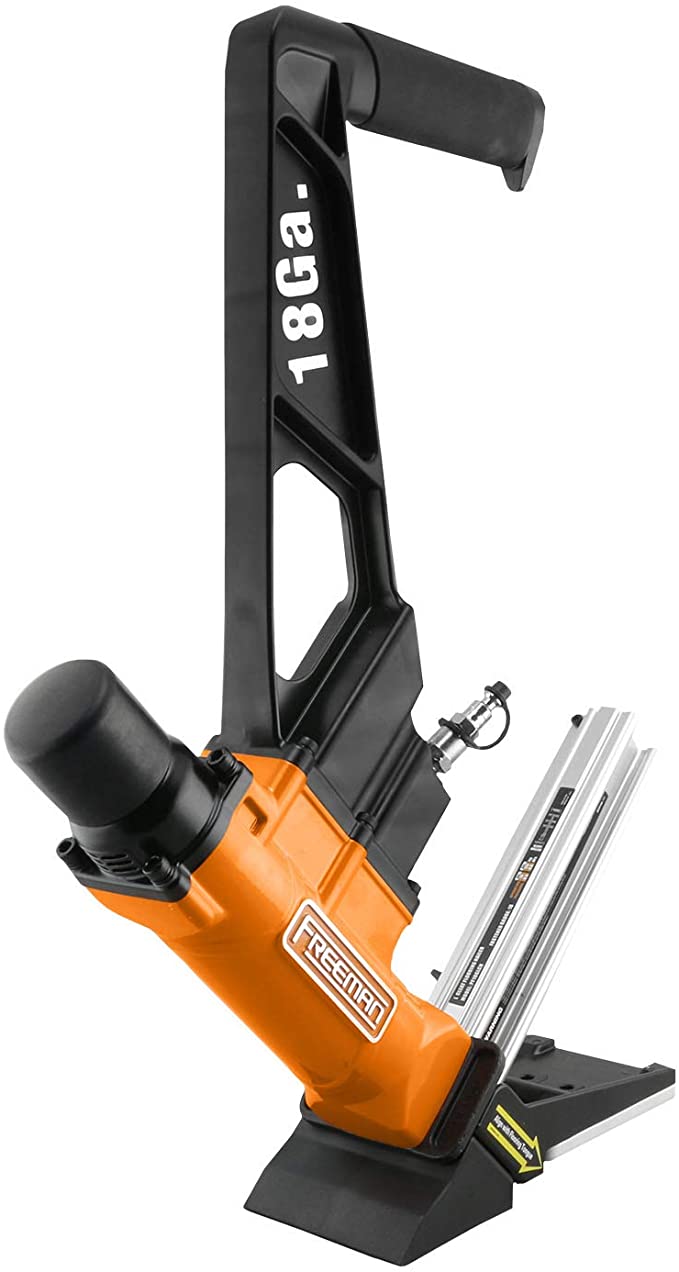

This pneumatic nailer has a lightweight aluminum body, an ergonomic comfort grip handle, a light strike bumper, and three different base plates that can be changed. If you have pre-finished flooring, the no mar foot will protect the surface from scratches and it is safe to use.
Driving 18 gauge L-cleats, this nailer is great for installing dense flooring like Brazilian teak and cherry. It’s also great for installing engineered flooring or other exotic hardwoods. The magazine can hold up to 120 screws.
This is what you need. We want to make sure our customers get great value, great customer service, and long-lasting, high-quality products. For everything from roofing to siding to flooring, we make nailers and staplers that can be used for everything from nails and screws.
Tough and reliable: We make a wide range of construction tools and accessories that are built to last, like staplers and nailers for siding, flooring, framing, finish, and roofing. Compare our products to those made by Makita, Hitachi, Bostitch, Senco, Paslode, and Dewalt and see which ones are better.
PF18GLCN is an 18-gauge, 1-3/4-inch pneumatic drill “For example, the L-Cleat Flooring Nailer is made for installing tongue and groove hardwood flooring. It’s also made for dense wood applications like strand woven bamboo and teak, cherry, and other exotic woods. With three different base plates, this air-powered nailer can work on 3/8″ to 3/4″ flooring. It can also work with 18 gauge L-cleats from 1-1/4″ to 1-3/4”, and it can be used with three different base plates. This durable pneumatic tool is made of lightweight aluminum and steel parts that have been heat-treated. It’s easy to use for a long time because it’s lightweight and durable. With an ergonomically designed extended reach handle and a light strike bumper, you can cut down on your fatigue. People who want to do DIY projects at home can use a no-mar foot to protect finished floors and make sure they get good results, no matter where they work. In this video, you can see the Pneumatic 18 Gauge 1-3/4 Inch tool “The L-Cleat Flooring Nailer comes with a long-reach fiberglass mallet with a padded grip, three interchangeable base plates, air tool oil, and other tools to help you set it up. It can be made of brick, concrete or wood. There are pavers, stones and tiles.
In the beginning, I want to say thank you to Bogdel and the people who bought it. They let me know how it worked.
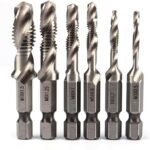
to stop the same questions from being asked. It only needs 18G 1-1/4 – 1-3/4. That’s all it needs. Almost nothing else. It doesn’t work with engineered, laminate, or American wood.
It doesn’t matter if it’s made of steel or laminate: get a 20G stapler.
Hardwoods get a 16G mallet Cleat / Staple Nailer to help them.
If you want to buy a nailer, you should buy the $600 Power Nailer. If you want to buy the $700 PrimeTech, you should buy it for $800.
There is another reason I will not tell you how much it costs. It has gone up since I bought it. So I’m happy with what I paid and would still pay the price it’s now. But I’d rather pay the same amount again. There is nothing left to do.
It didn’t jam on me once in the two days that I was installing it. As I ran down the rows, I only face-nailed one board. Never shoot twice. and six nails didn’t sink all the way in, but that could have been because of the sub floor. This is how it works. I oiled it twice a day, once when I started, and again at the middle of the day. There were 4 oilings on both days, each with 2 drops. Also, for those who had a hard time getting it to work. Here are some things you might be having.
Don’t touch the plates. The thickness of wood isn’t the same from one company to the next. A plate will help you figure out how thick your floor is. Then, you can adjust from there until the plate is just a little too close to the subfloor with a slight tilt so the tip of your shoe is in touch with the floor.
2. When you touch the bamboo, don’t feel for the resting point. Instead, look for it. .. OR YOU WILL FACE NAIL IN THE WOOD.
3: At the very least, oil it before each use, but better to do it a second time during the day.
4.Your hammer hit makes all the difference. This is what you should do. This unit doesn’t hit from the side very well. You don’t have to slam it.
But don’t hit like a sissy, either. Pull your arm up and swing it like you normally would. 1 ft away from the head of the pump.
5. Finally, air pressure. Every air compressor is different. They have different recovery rates and sfcm’s, but they all work in the same way. You need to find the right pressure for the compressor that you have. What works for one compressor may not work for another. When you start at the general recommendation, you can change it up or down by 2-3 psi at a time.
I found that with my ridgid vertical pancake 150 mas psi compressor with 3.9 sfcm’s, 72 psi was the sweet spot. This is what I did. and I was able to shoot half a strip of nailers before the recovery process began. So I took a break until it was back to normal. there will be too little pressure and there will not be enough of a fight (Hence, why it would not sink flush).
So, hopefully this will help some people. I’ll be happy to help anyone who has any questions or needs help, and I hope this helps. For bamboo, you don’t need nailers that cost $500 or more. But you need 18G nails. There are no ifs, ands, or buts. This nailer is only for bamboo because it doesn’t want to make the cleat dimple nightmares that have happened on so many projects.
Finally, this is for freeman, and this is the last thing. This time, add a few more things.
1. If anyone is a tool fan like me and wants to protect their money, include the case and raise the price a little.
2. Take all of your base plates and combine them into one. Then, slide two side rails on and lock them in place with a quick lock bolt.
3. Make your handle 4 inches shorter, so you can get all but the last board and start using it after the second row instead of the third.
4. Finally, put a dry fire lock on so I don’t fly by sinking cleats and then find out later that there are no cleats in the board.
Other than that, this is all you need to know about this cleat nailer. It’s a great tool, too.